Grphql Tutorial 2
by 김지운
들어가며
Graphql Tutorial 1 에서 Graphql이 어떤면에서 좀 더 괜찮은지 살펴봤다.
이제 본격적으로 코드를 보도록 하겠다.
일단 필요한 의존성은 아래 package.json을 참고하도록 한다.
package.json
{
  "name": "graphql",
  "version": "0.0.0",
  "description": "using vs code project",
  "main": "index.js",
  "engines": {
    "node": "^8.9.4",
    "npm": "^5.6.0"
  },
  "scripts": {
    "test": "echo \"Error: no test specified\" && exit 1",
    "build": "tsc",
    "start": "node ./dist/index.js"
  },
  "devDependencies": {
    "@types/express": "^4.16.0",
    "@types/nodemailer": "^4.6.5"
  },
  "dependencies": {
    "apollo-server-express": "^2.3.1",
    "express": "4.16.0",
    "reflect-metadata": "^0.1.12",
    "type-graphql": "^0.16.0",
    "typedi": "^0.8.0",
    "typescript": "3.2.2",
    "nodemailer": "^5.0.0"
  },
  "keywords": [
    "vs"
  ],
  "author": "kishe56@gmail.com",
  "license": "MIT"
}
Graphql Tutorial 1 에서 이야기 했듯이 Graphql은 정의한 schema가 전부이다.
이 schema를 작성할 때 타입 실수를 줄이는데 typescript가 도움이 되기때문에 이용하도록한다.
그리고 typescript를 사용하기때문에 몇몇 모듈은 type선언된 모듈을 추가로 의존성에 추가해야할 수 있다.
@types/express와 @types/nodemailer가 각각 express와 nodemailer의 자료형이 선언된 모듈이다.
이 모듈들은 컴파일 과정에 추가되게 된다.
그 외에 type-graphql,typedi,reflect-metadata는 Graphql schema 정의 및 context 제어에 사용할 모듈들이다.
여기까지 의존성을 작성해주고 npm install 로 설치하고
프로젝트의 루트에 tsconfig.json 이란 설정파일을 작성해준다.
이름에서 알 수 있듯이 typescript 설정 파일로 compile 옵션 및 규칙들을 관리하는데 사용하는 파일이다.
tsconfig.json
{
    "compilerOptions": {
      "target": "esnext",
      "module": "commonjs",
      "outDir": "dist",
      "sourceMap": true,
      "moduleResolution": "node",
      "experimentalDecorators": true,
      "emitDecoratorMetadata": true,
      "allowSyntheticDefaultImports": true,
      "esModuleInterop": true
    },
    "include": [
      "src/**/*.ts"
    ],
    "exclude": [
      "node_modules"
    ]
}
일단 compilerOptions 부터 보면
첫번째로 "target": "esnext"가 있는데 사용할 ecmascript 버전을 특정하는 옵션이다.
“ES3” (default), “ES5”, “ES6”/”ES2015”, “ES2016”, “ES2017” or “ESNext” 과 같은 값이 올 수 있고
esnext는 최신 버전을 이용하겠다이다.
그 다음 "module": "commonjs"은 module 코드를 생성할 때 어떤 환경을 기반으로 할것이냐 인데
“None”, “CommonJS”, “AMD”, “System”, “UMD”, “ES6”, “ES2015” or “ESNext” 이 올수 있다.
우리는 Node에서 많이 사용하는 CommonJS로 특정한다.
"outDir": "dist" 은 컴파일 결과가 출력될 디렉토리 경로이다. 우리는 루트의 dist에 출력한다고 정한다.
"sourceMap": true 은 자동 생성되는 코드와 원본 코드간 연결해주는 sourceMap을 생성할지 여부이다.
"moduleResolution": "node"은 module을 참조할때 어떻게 참조할지인데 node 의 모듈 참조 방식을 이용한다.
“Node”와 “Classic”이 올 수 있다.
"experimentalDecorators": true은 es decorator 문법 허용 여부인데 true로 해준다.
"emitDecoratorMetadata": true은 decorating된 선언을 위해 설계 데이터를 내보낸다는 것으로 true로 해준다.
"allowSyntheticDefaultImports": true default export가 없더라도 default import를 허용할지 여부이다 true로 해준다.
"esModuleInterop": true 위 옵션과 함께 true로 해준다.
이제 include 와 exclude가 남았는데 컴파일 시 포함할 파일과 아닐 파일을 지정한다.
루트에서 src/ 아래로 있는 ts는 모두 포함하고 node_modules에 설치된 모듈은 제외한다.
이외에 여러 설정이 있지만 일단 이정도만 하도록 한다.
자세한 옵션 내용은 typescript-handbook을 참고한다.
이제 지긋지긋한 설정은 끝이 났다.
설정이 좀 힘들었으니 쉬어가는 타임으로 기본 코드만 작성해보고 이번 튜토리얼은 마무리한다.
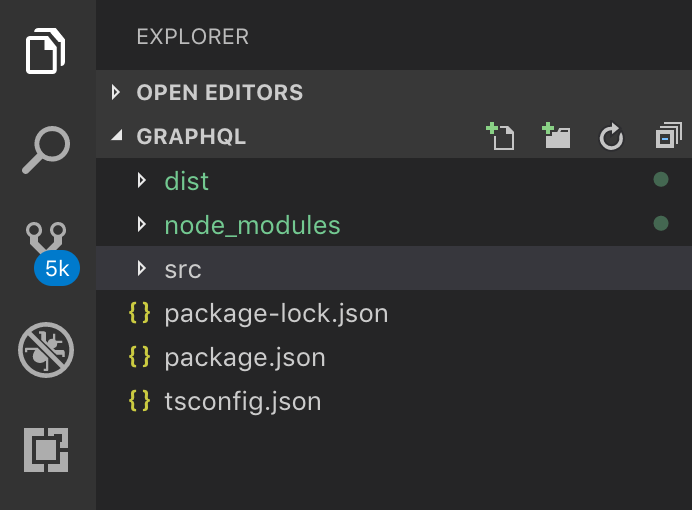
아래 스크린샷처럼 프로젝트의 루트에서 우리가 위에서 설정한대로 컴파일에 사용할 ts 파일들을 작성할 src 디렉리를 생성한다.

그 다음 index.ts 라고 파일을 하나 생성하자
index.ts의 내용은 다음과 같이 작성한다.
import express from "express";
import {ApolloServer,gql} from "apollo-server-express";
async function boot(){
  const app = express();
  const port = 3000;
  // Construct a schema, using GraphQL schema language
  const typeDefs = gql`
  type Query {
    hello: String
    people: [Person]
  }
  type Person{
    name: String
    age: Int
  }
  `;

  // Provide resolver functions for your schema fields
  const resolvers = {
    Query: {
      hello: () => 'hello world',
      people: () => {
        return [{
          name: "Davidkim",
          age: 18
        },{
          name: "Alice",
          age: 18
        }]
      }
    }
  };
  const apolloServer = new ApolloServer({
    typeDefs,
    resolvers,
    playground:true,
    tracing: true
  })
  apolloServer.applyMiddleware({app});
  try{
    await app.listen(port)
  }catch(e){
    console.log('error '+e);
  }

  console.log(`🚀 Server ready at http://localhost:3000${apolloServer.graphqlPath}`)
}

boot()
자 코드는 서버를 시작하는 부분을 제외하곤 앞에서 봤던 코드이다.
그럼 이제 terminal에서 npm run-script build를 실행하자.
처음 작성한 package.json 을 잘 보면 scripts에 build라고 지정해놨는데
tsc 모듈을 이용해서 컴파일을 하는 과정이다.
명령어가 정상적으로 실행이 되었으면 프로젝트의 루트에 dist 디렉토리가 생성되었을것이다.
그 아래에 index.js와 index.js.map 이 생성되었을 것인데
이 index.js 는 node 명령어로 실행할 수 있는 파일이다.
물론 이러한 과정을 안거치고 ts node와 같은 모듈로 바로 실행할 수도 있다.
어쨋든 이제 대망의 실행시간이다.
npm start로 실행해본다.
 위와같이 로그가 뜬다면 정상적으로 실행된것이다.
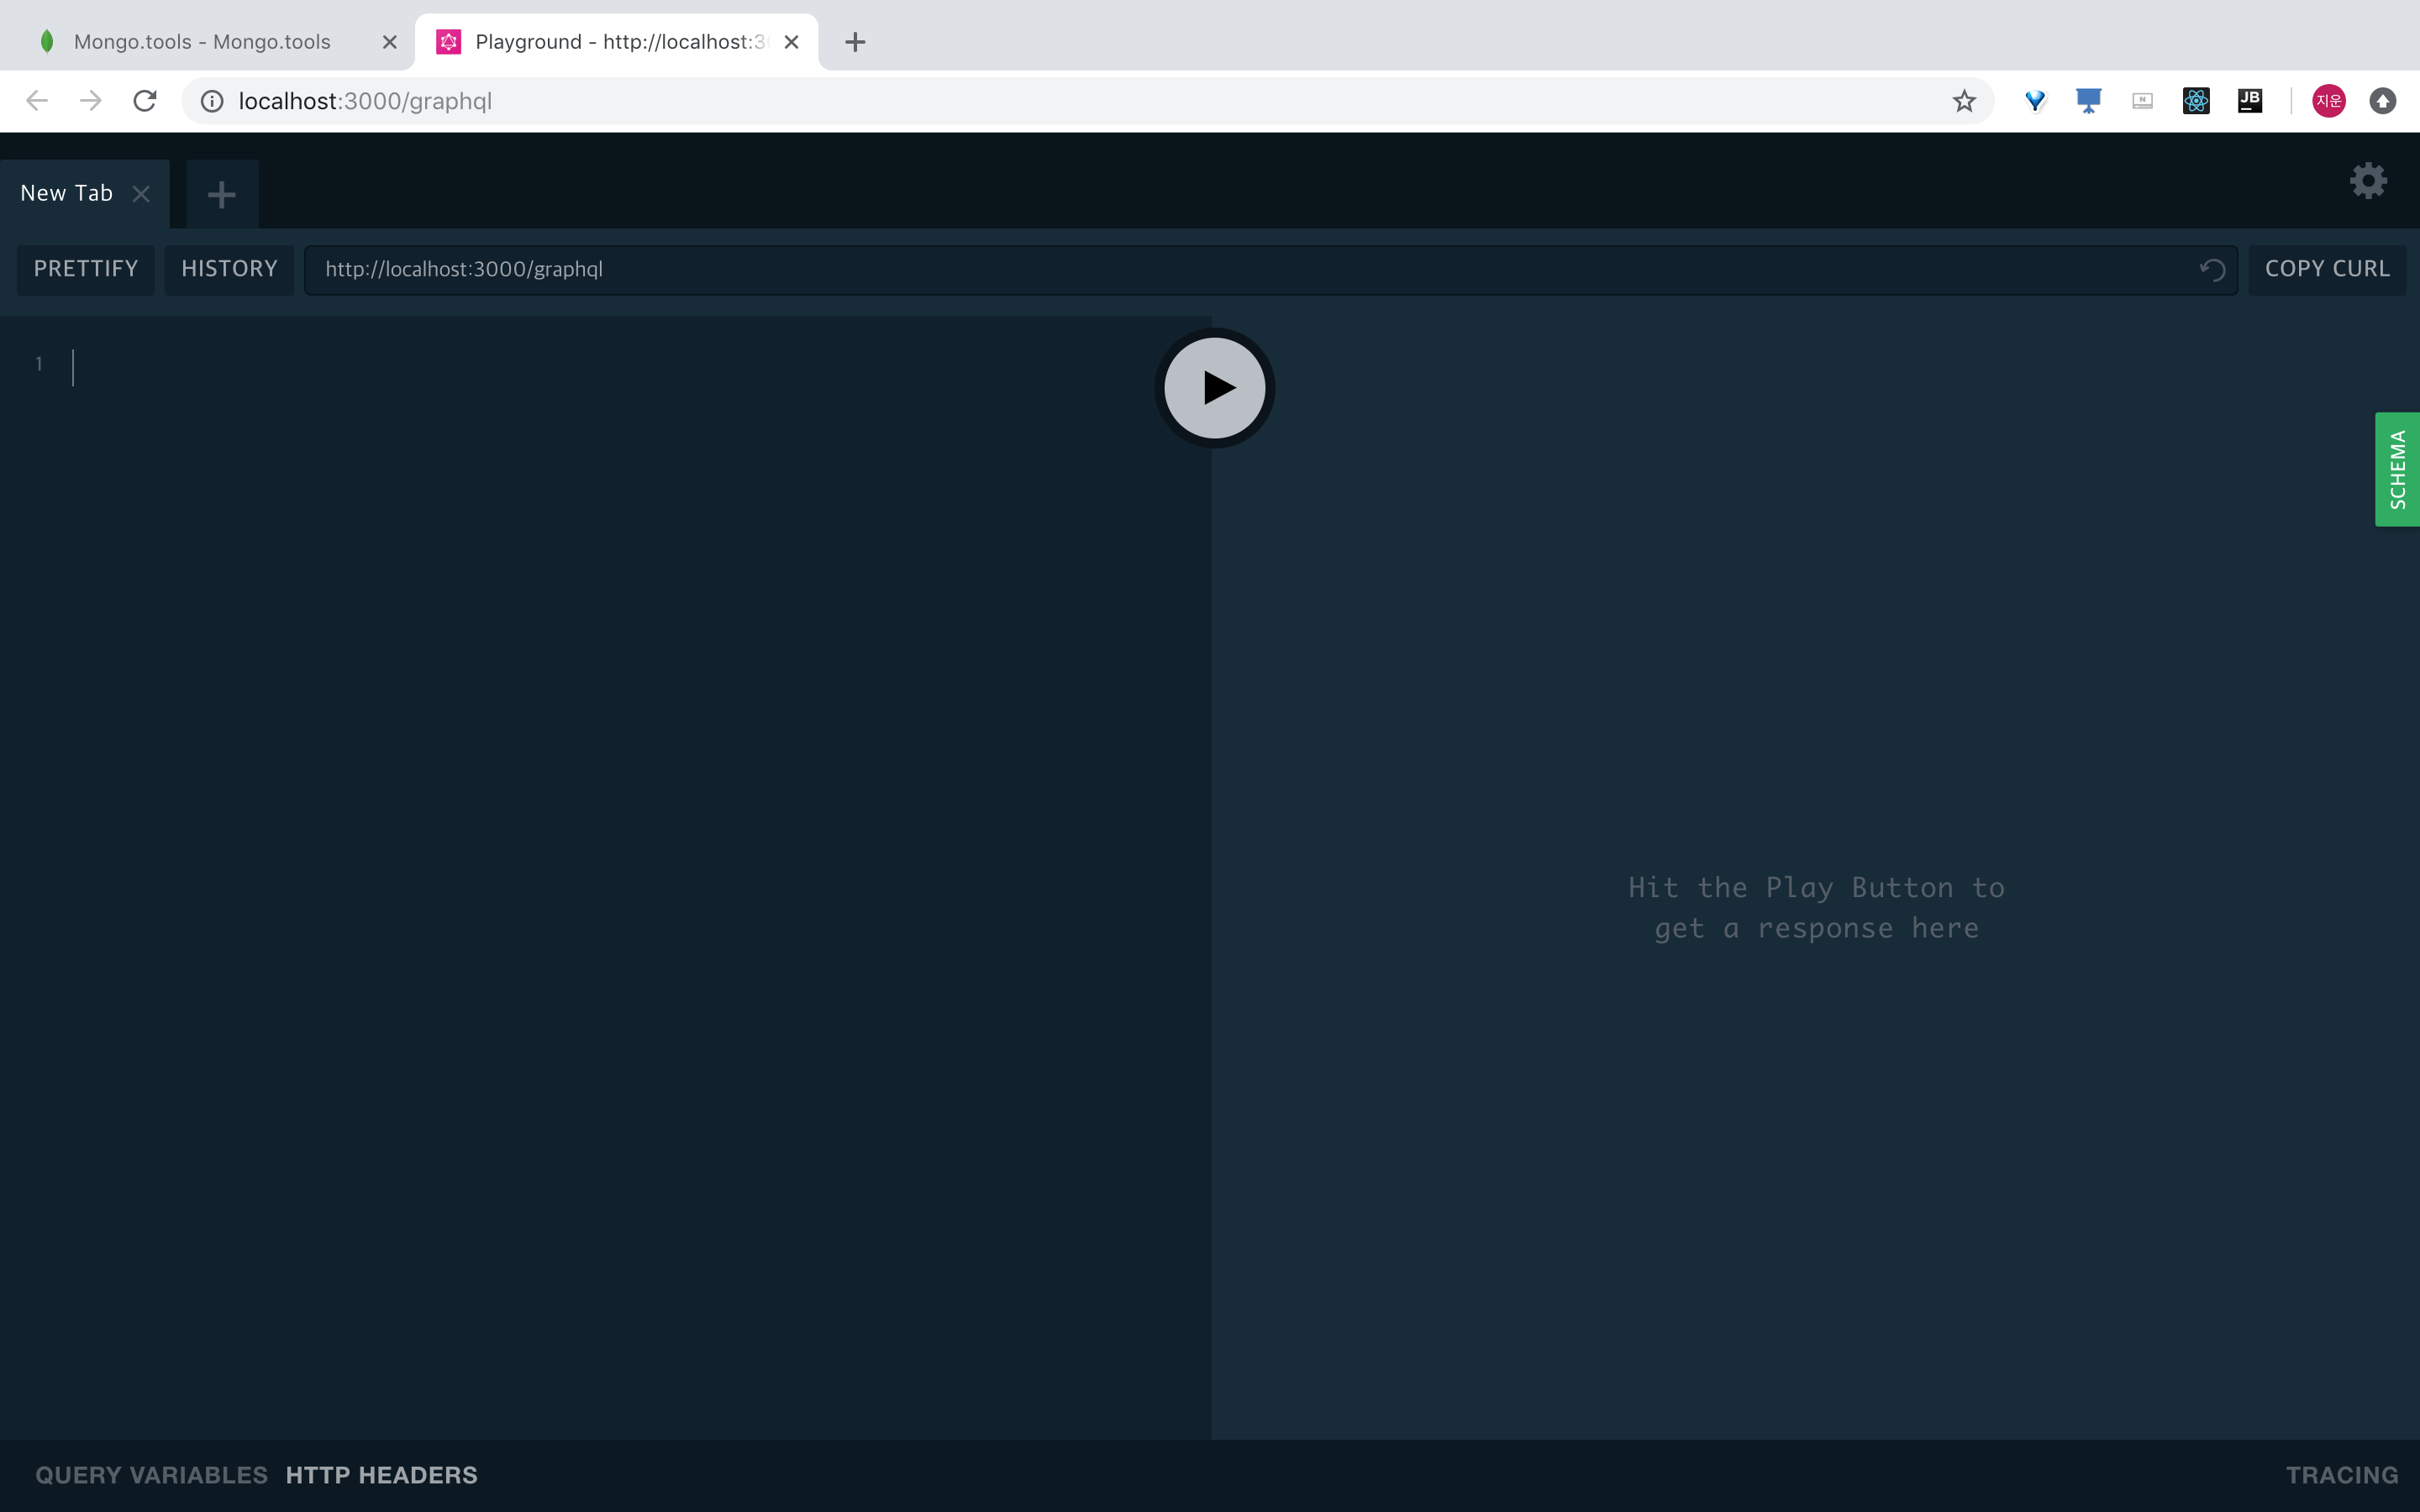
자 로그에 뜬 주소로 접속해본다.

위와 같이 playground 화면이 보일것이다.
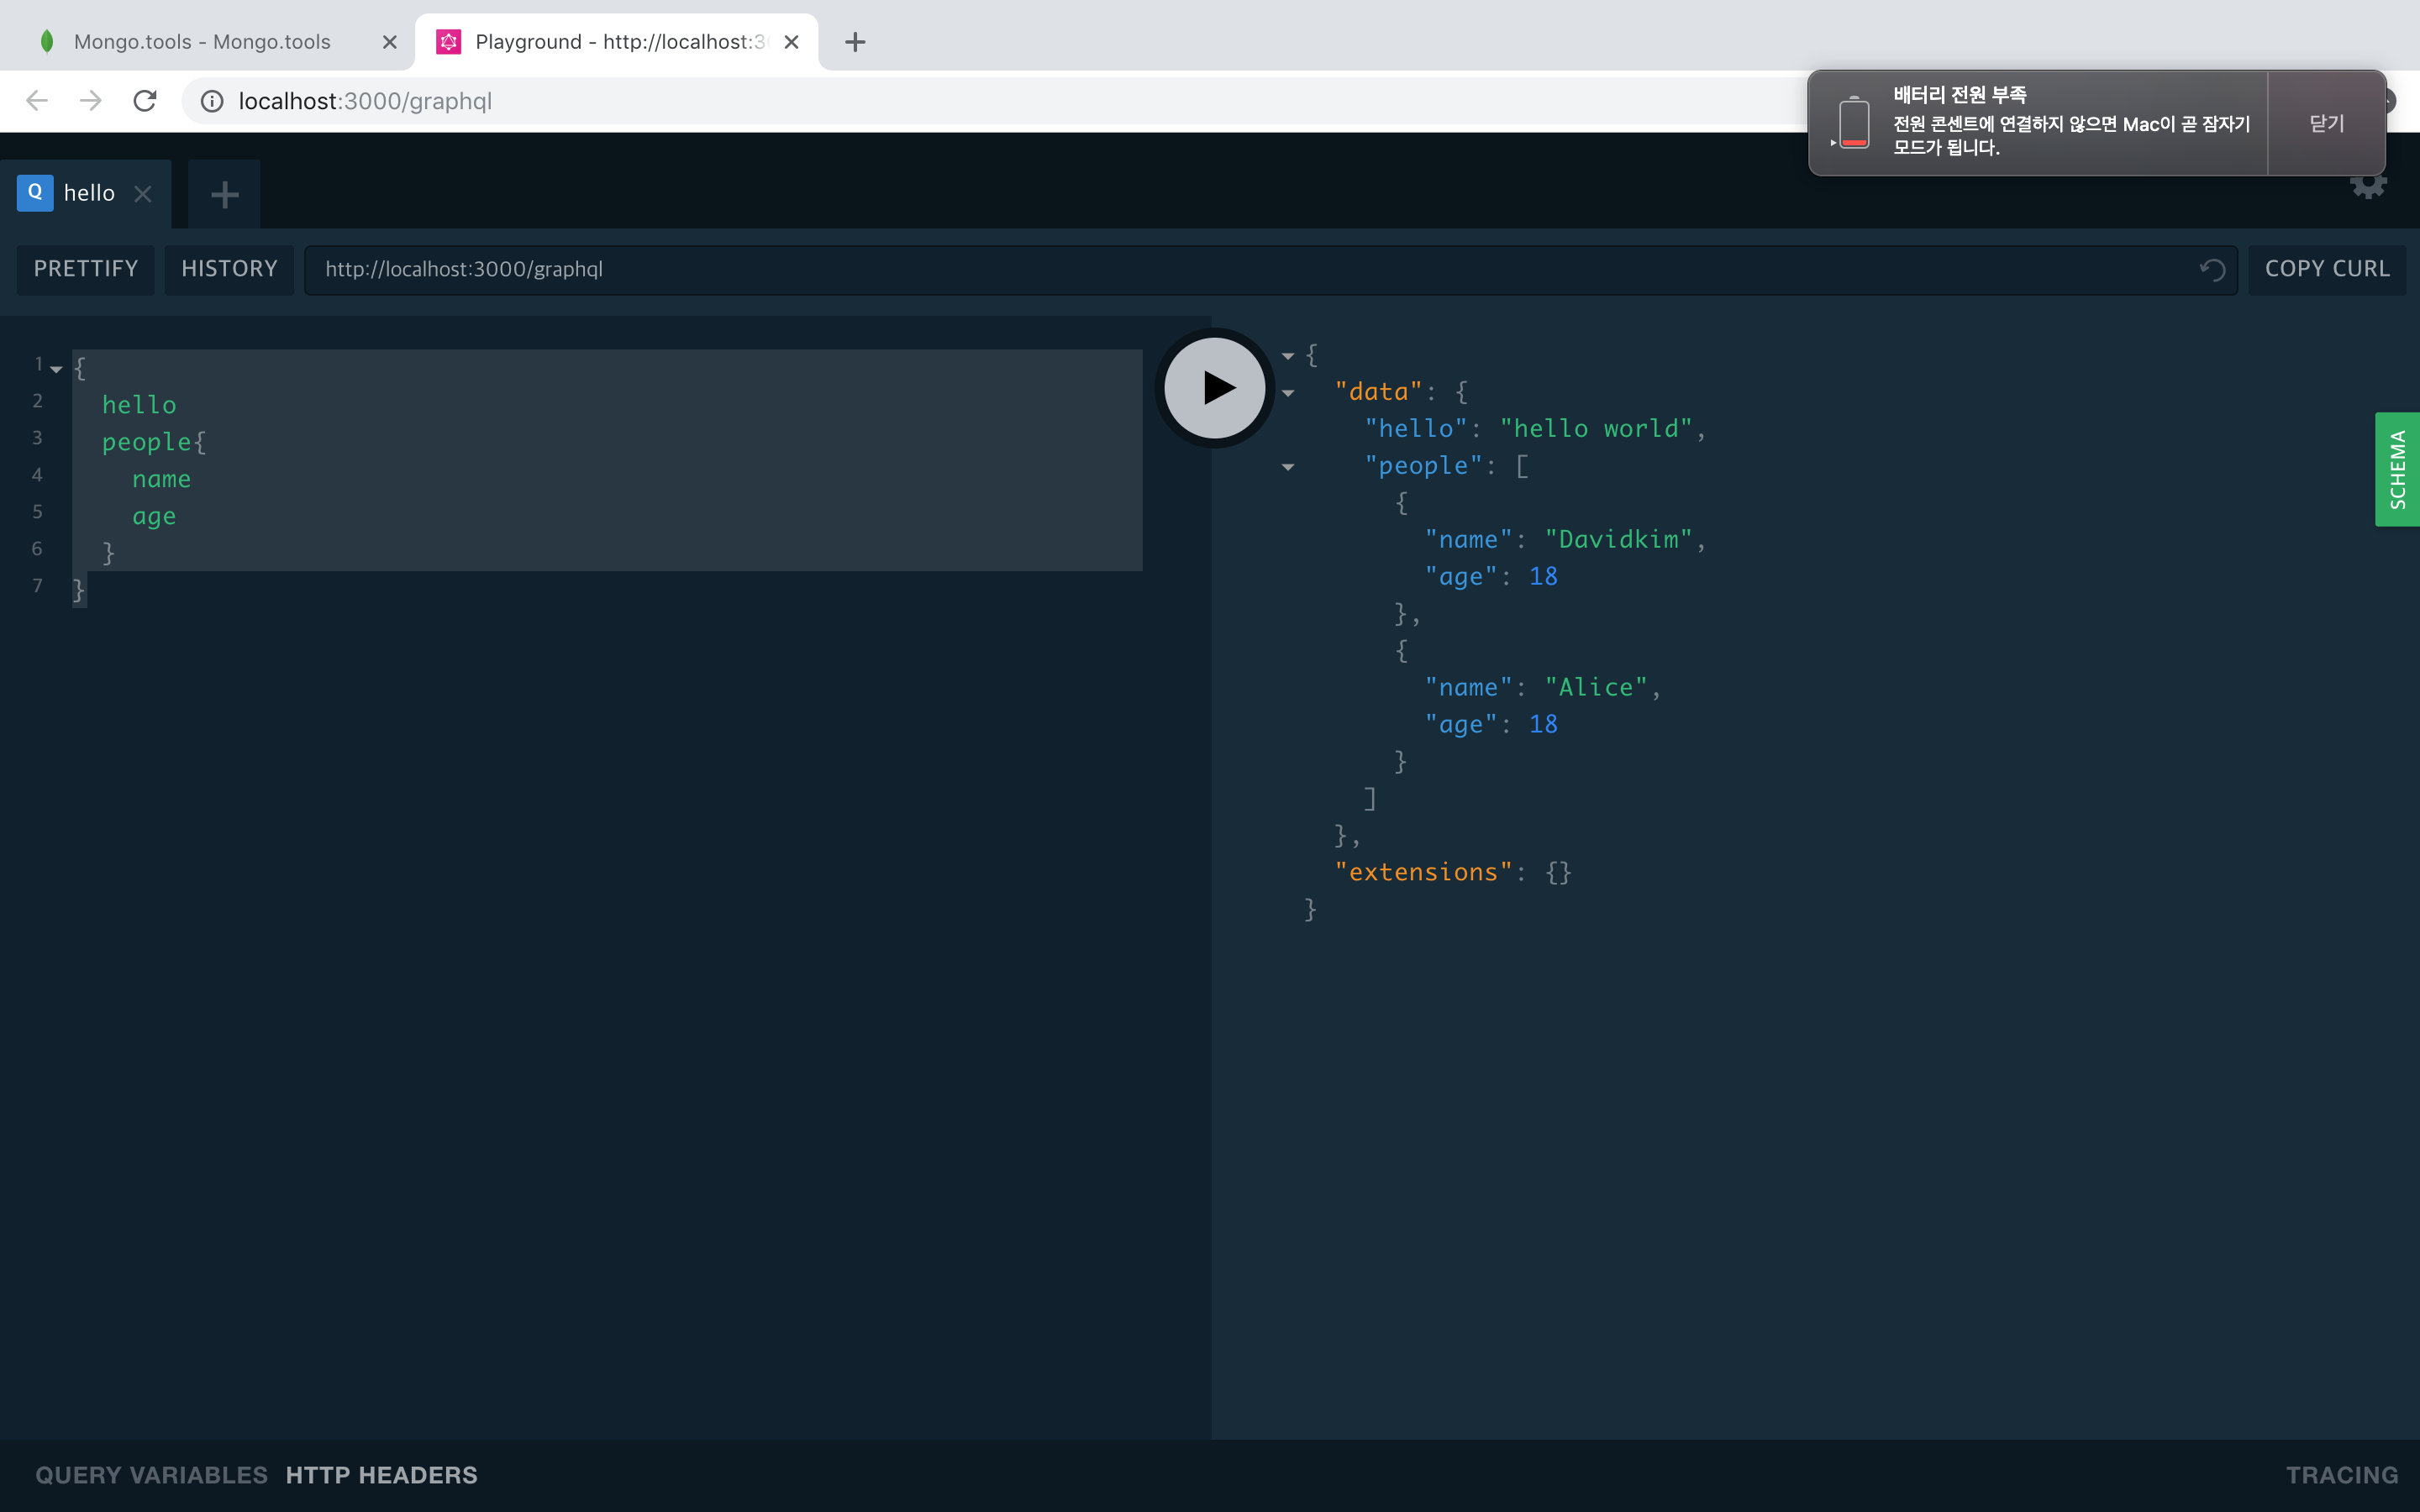
playground의 좌측에 질의를 입력할 수 있는 창이있는데 그곳에 아래 구문을 입력한다.
{
  hello
  people{
    name
    age
  }
}
의미는 쿼리에 정의해놓은 hello와 people을 요청하고 결과를 반환받는것이다.
입력하고 중앙에 동그라미 안에 화살표가 그려진 실행버튼을 클릭하면 아래처럼 쿼리 결과가 보인다.

자 오른쪽 창에서 people에서 age만 지워보고 실행해보자 그러면 age는 가져오질 않는걸 볼 수 있다.
이외에도 playground 화면 아래쪽을 보면 QUERY VARIABLE, HTTP HEADER, TRACING이 있는걸 볼 수 있는데
쿼리에 들어가는 변수의 세팅, 요청 헤더, 요청 응답 추적을 할 수 있다.
절반은 왔다.
type-graphql 과 typedi 를 활용하는 내용은
다음 튜토리얼에서 사용자 관련 API 를 예로 작성하며 진행한다.
Subscribe via RSS